
Saturday, September 14, 2013

How to charge any device from Lemon
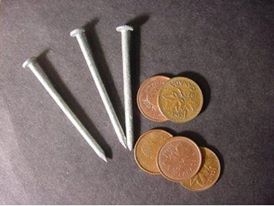
Step 2:-

Step 3:-

Step 4:-

Step 5:-

Step 6:-

Step 7:-

Step 8:-

Step 9:-

Video Understanding :-
Saturday, June 1, 2013
Two Datasource in Spring/Hiberate
We can create two datasource in a single spring/hibernate application.
There are following steps required to implement this:-
Create JNDI Datasource while using Tomcat :-
There are following steps required to implement this:-
Create JNDI Datasource while using Tomcat :-
- Resource entry in server.xml under <GlobalNamingResources> for both datasources
You can find server.xml in following path in Tomcat folder :-
c://Tomcat/conf/server.xml - Do the entry in web.xml for both resources
You can find web.xml in WEB-INF folder of your application - Use datasource in applicationContext or spring context file
- Create two session factory for using two datasource.
<bean id="firstSessionFactory" class="org.springframework.orm.hibernate3.annotation.AnnotationSessionFactoryBean" p:dataSource-ref="firstDataSource" p:configLocation="${hib.config}" p:packagesToScan="com.org.xyz.domain"> </bean><bean id="secondSessionFactory" class="org.springframework.orm.hibernate3.annotation.AnnotationSessionFactoryBean" p:dataSource-ref="secondDataSource" p:configLocation="${hib.config}" p:packagesToScan="com.org.abc.domain"> </bean> - Now these session factories can be used in Hibernate application.
<globalnamingresources>
    <resource name="jdbc/first"  driverclassname="com.microsoft.sqlserver.jdbc.SQLServerDriver" maxwait="5000" password="makecodeeasy" type="javax.sql.DataSource" url="jdbc:sqlserver://localhost:1433;DatabaseName=DataTest" username="makecodeeasy" validationquery="select 1">
    </resource>

 <resource name="jdbc/second"  driverclassname="com.microsoft.sqlserver.jdbc.SQLServerDriver" maxwait="5000" password="123" type="javax.sql.DataSource" url="jdbc:sqlserver://192.182.21.66:1433;DatabaseName=Second" username="sa" validationquery="select 1">
    </resource>
 </globalnamingresources>
Note :- Database used here in MS Sql server 2008. You can use any database.
You need to change driverClassname, url, username and password according to
database.
<resource-ref>
  <description>DB Connection Pooling</description>
  <res-ref-name>java:comp/env/jdbc/first</res-ref-name>
  <res-type>javax.sql.DataSource</res-type>
  <res-auth>Container</res-auth>
  <res-sharing-scope>Shareable</res-sharing-scope>
</resource-ref>


<resource-ref>
  <description>DB Connection Pooling</description>
  <res-ref-name>java:comp/env/jdbc/second</res-ref-name>
  <res-type>javax.sql.DataSource</res-type>
  <res-auth>Container</res-auth>
  <res-sharing-scope>Shareable</res-sharing-scope>
</resource-ref>
<bean id="firstDataSource" class="org.springframework.jndi.JndiObjectFactoryBean">
  <property name="jndiName" value="java:comp/env/jdbc/first" />
  <property name="resourceRef" value="true" />
</bean>
<bean id="secondDataSource" class="org.springframework.jndi.JndiObjectFactoryBean">
  <property name="jndiName" value="java:comp/env/jdbc/second" />
  <property name="resourceRef" value="true" />
</bean>
Sunday, May 19, 2013
JNDI Datasource in spring
There are two sources of database connections - either a DataSource or a DriverManager.
JNDI
The Java Naming and Directory Interface (JNDI) is part of the Java platform, providing applications based on Java technology with a unified interface to multiple naming and directory services. You can build powerful and portable directory-enabled applications using this industry standard.
Create JNDI Datasource while using Tomcat :-
JNDI
The Java Naming and Directory Interface (JNDI) is part of the Java platform, providing applications based on Java technology with a unified interface to multiple naming and directory services. You can build powerful and portable directory-enabled applications using this industry standard.
Create JNDI Datasource while using Tomcat :-
- Resource entry in server.xml under <GlobalNamingResources>
You can find server.xml in following path in Tomcat folder :-
c://Tomcat/conf/server.xml - Do the entry in web.xml
You can find web.xml in WEB-INF folder of your application - Use datasource in applicationContext or spring context file
- Your Datasource is ready to use. It can also be used in hibernate.
<globalnamingresources>
    <resource name="jdbc/test"  driverclassname="com.microsoft.sqlserver.jdbc.SQLServerDriver" maxwait="5000" password="makecodeeasy" type="javax.sql.DataSource" url="jdbc:sqlserver://localhost:1433;DatabaseName=DataTest" username="makecodeeasy" validationquery="select 1">
    </resource>
</globalnamingresources>
Note :- Database used here in MS Sql server 2008. You can use any database.
You need to change driverClassname, url, username and password according to
database.
<resource-ref>
  <description>DB Connection Pooling</description>
  <res-ref-name>java:comp/env/jdbc/test</res-ref-name>
  <res-type>javax.sql.DataSource</res-type>
  <res-auth>Container</res-auth>
  <res-sharing-scope>Shareable</res-sharing-scope>
</resource-ref>
<bean id="dataSource" class="org.springframework.jndi.JndiObjectFactoryBean">
  <property name="jndiName" value="java:comp/env/jdbc/test" />
  <property name="resourceRef" value="true" />
</bean>
Saturday, May 18, 2013
Browser CSS Hacks
CSS Hacks
/***** Selector Hacks ******/
/* IE6 and below */
* html #mydiv { color: red }
/* IE7 */
*:first-child+html #dos { color: red }
/* IE7, FF, Saf,
Opera */
html>body # mydiv { color: red }
/* IE8, FF, Saf, Opera
(Everything but IE 6,7) */
html>/**/body # mydiv { color: red }
/* Opera 9.27 and below,
safari 2 */
html:first-child # mydiv { color: red }
/* Safari 2-3 */
html[xmlns*=""] body:last-child #seis { color: red }
/* safari 3+, chrome 1+,
opera9+, ff 3.5+ */
body:nth-of-type(1) #mydiv { color: red }
/* safari 3+, chrome 1+,
opera9+, ff 3.5+ */
body:first-of-type #mydiv { color: red }
/* saf3+, chrome1+ */
@media screen and
(-webkit-min-device-pixel-ratio:0) {
#mydiv { color: red }
}
/* iPhone / mobile webkit
*/
@media screen and
(max-device-width: 480px) {
#mydiv { color: red }
}
/* Safari 2 - 3.1 */
html[xmlns*=""]:root #mydiv { color: red }
/* Safari 2 - 3.1, Opera
9.25 */
*|html[xmlns*=""] #mydiv { color: red }
/* Everything but IE6-8
*/
:root *> #mydiv { color: red }
/* IE7 */
*+html #mydiv { color: red }
/* Firefox only. 1+ */
#mydiv , x:-moz-any-link { color: red }
/* Firefox 3.0+ */
#mydiv , x:-moz-any-link, x:default { color: red }
/* FF 3.5+ */
body:not(:-moz-handler-blocked) #mydiv { color: red; }
/***** Attribute Hacks ******/
/* IE6 */
#mydiv { _color: blue }
/* IE6, IE7 */
#mydiv { *color: blue; /* or #color: blue */ }
/* Everything but IE6 */
#mydiv { color/**/: blue }
/* IE6, IE7, IE8 */
#mydiv { color: blue\9; }
/* IE7, IE8 */
#mydiv { color/*\**/: blue\9; }
/* IE6, IE7 -- acts as an
!important */
#mydiv { color: blue !ie; } /* string after ! can be
anything */
/* IE8, IE9 */
#mydiv {color: blue\0/;} /* must go at the END of all rules */
Some More Hacks :-
#mydiv {
width:89px; (common for all)
margin-left/*\**/:90px\9; ( For IE8)
margin-top/*\**/:-31px\9;
}
#mydiv {
margin-left/*\**/:90px\9; ( For IE8)
margin-top/*\**/:-31px\9;
}
#mydiv {
width:89px;
margin-left/*\**/: 180px\9;
margin-top/*\**/:-32px\9;
}
(only IE6)
* html #mydiv {
margin-left:95px;
margin-top:-33px;
}
*html #mydiv {
margin-left:186px;
margin-top:-30px;
}
(only IE7)
*:first-child+html #mydiv {
margin-left:90px;
margin-top:-30px;
}
*:first-child+html #mydiv {
margin-left:180px;
margin-top:-27px;
}
(SAFARI)
body:last-child:not(:root:
margin-left:90px;
margin-top:-31px;
}
body:last-child:not(:root:
margin-left:180px;
margin-top:-31px;
}
/* body:first-of-type #mydiv {
margin-left:90px;
margin-top:-31px;
}
body:first-of-type #mydiv {
margin-left:180px;
margin-top:-31px;
}
*/
/*::root #mydiv {
margin-left:90px;
margin-top:-31px;
}
::root #mydiv {
margin-left:180px;
margin-top:-31px;
}
*/
/* @media screen and (-webkit-min-device-pixel-
#mydiv {
margin-left:90px;
margin-top:-31px;
}
#mydiv {
margin-left:180px;
margin-top:-31px;
}
}
*/
margin-left/*\**/: 180px\9;
margin-top/*\**/:-32px\9;
}
(only IE6)
* html #mydiv {
margin-left:95px;
margin-top:-33px;
}
*html #mydiv {
margin-left:186px;
margin-top:-30px;
}
(only IE7)
*:first-child+html #mydiv {
margin-left:90px;
margin-top:-30px;
}
*:first-child+html #mydiv {
margin-left:180px;
margin-top:-27px;
}
(SAFARI)
body:last-child:not(:root:
margin-left:90px;
margin-top:-31px;
}
body:last-child:not(:root:
margin-left:180px;
margin-top:-31px;
}
/* body:first-of-type #mydiv {
margin-left:90px;
margin-top:-31px;
}
body:first-of-type #mydiv {
margin-left:180px;
margin-top:-31px;
}
*/
/*::root #mydiv {
margin-left:90px;
margin-top:-31px;
}
::root #mydiv {
margin-left:180px;
margin-top:-31px;
}
*/
/* @media screen and (-webkit-min-device-pixel-
#mydiv {
margin-left:90px;
margin-top:-31px;
}
#mydiv {
margin-left:180px;
margin-top:-31px;
}
}
*/
Sunday, May 5, 2013
JNDI
The Java Naming and Directory Interface (JNDI) is part of the Java platform, providing applications based on Java technology with a unified interface to multiple naming and directory services. You can build powerful and portable directory-enabled applications using this industry standard.
Example of creating JNDI Datasource.
Example of creating JNDI Datasource.
Tuesday, April 30, 2013
Iterate a HashMap
HashMap is an object that stores both “key/value” as a pairs.
It is one of the most useful data structures in the Java programming language.
Step by Step Iterating a HashMap :-
Method 1 :-
Map<Integer, Integer> map = new HashMap<Integer, Integer>();

//iterating over keys only
for (Integer key : map.keySet()) {
System.out.println("Key = " + key);
}

//iterating over values only
for (Integer value : map.values()) {
System.out.println("Value = " + value);
}
Method 2 :-
Map<Integer, Integer> map = new HashMap<Integer, Integer>();
for (Map.Entry<Integer, Integer> entry : map.entrySet()) {
    System.out.println("Key = " + entry.getKey() + ", Value = " + entry.getValue());
}
Subscribe to:
Posts (Atom)